Not everyone can understand deeply and read Japanese mechanical drawings properly. So how to read the drawing properly? Let’s learn with me how to read Japanese mechanical drawings in the article below.
What is the JIS standard?
JIS Standard (English: Japanese Industrial Standards) is a Japanese industrial standard used in industrial activities in this country.
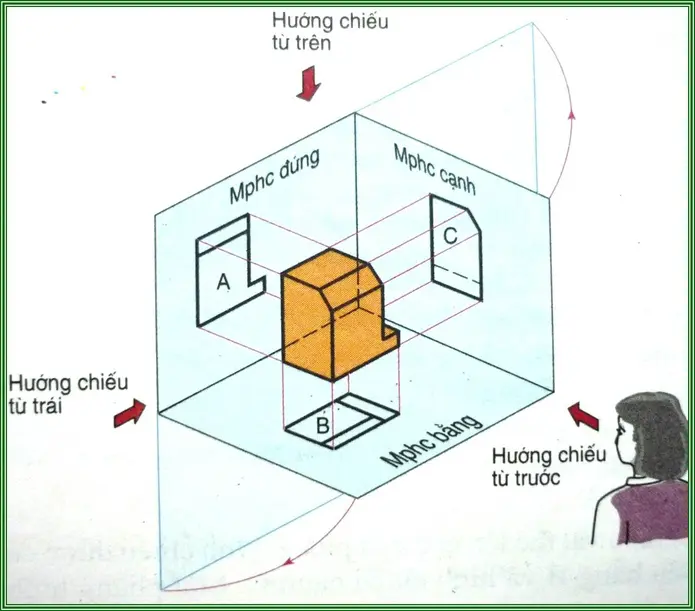
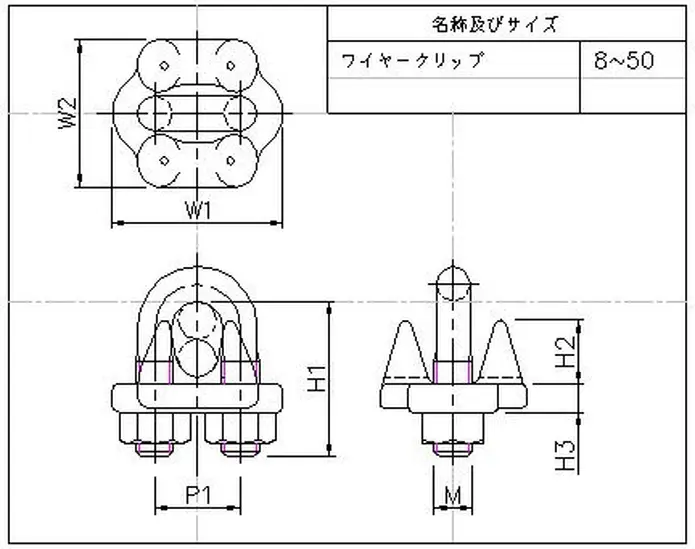
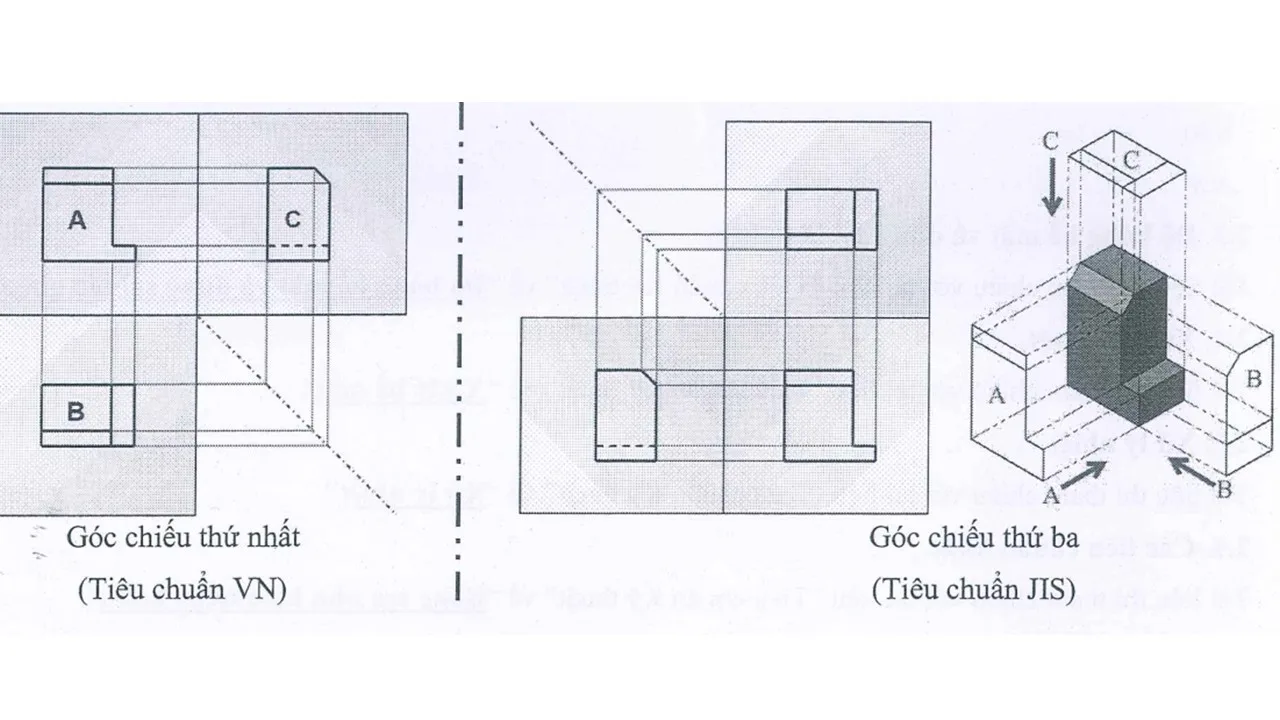
Unlike drawings in Vietnam, Japanese drawings have an edge-to-vertical projection layout and are used according to JIS standards – the 3rd angle projection method (illustration). In addition, when the processing details are complicated to clearly show the requirements to be processed, people will use cutting drawings and extract drawings.
Instructions on how to read Japanese mechanical drawings (JIS)
To understand how to layout and build projections according to JIS standards, please follow the reading below.
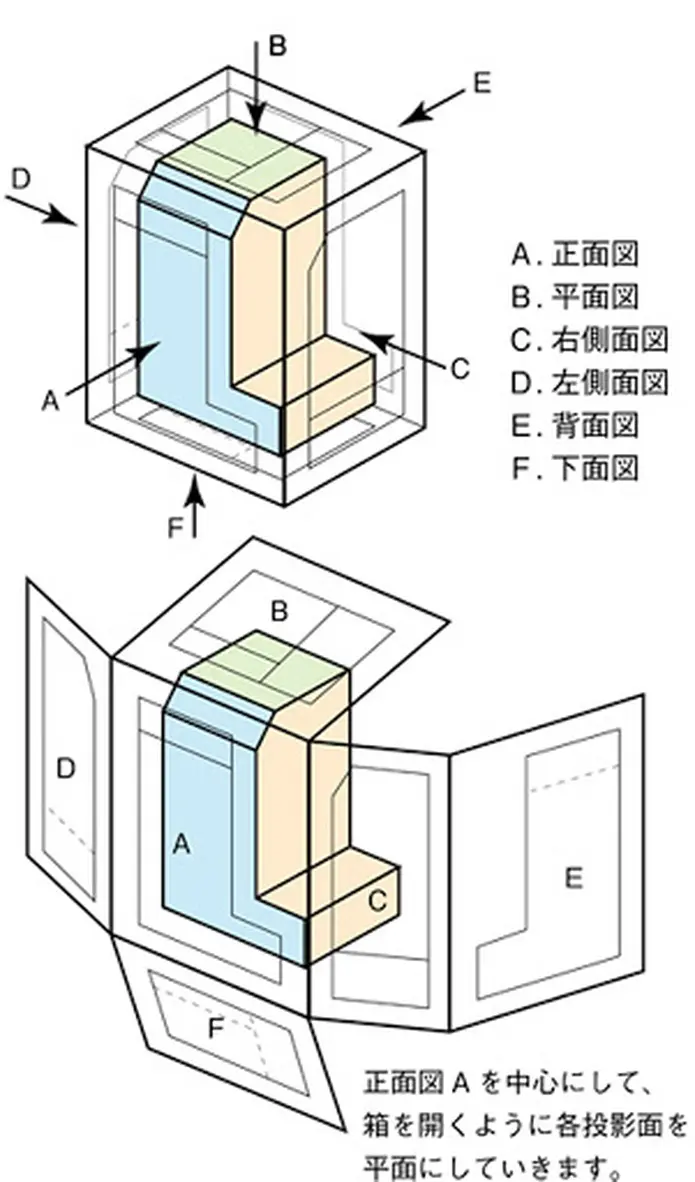
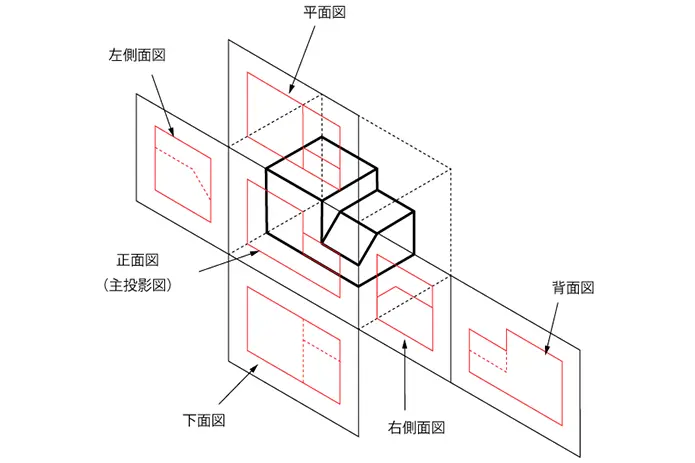
Suppose when there is a rectangular box with the symbol planes in the figure:
Looking from the outside, you will see the object passing through the planes and showing the faces of the rectangular box with the corresponding lines (visible or hidden).
If you open the planes of the box (shown below) you will get the corresponding projections of the object on the respective faces.
The planes of the box that are spread on the same plane will be the projection planes of the object.
As a result, each object will have 6 corresponding planes, but usually only 3 faces are enough. If it’s simple, it’s 2 projections, while it’s complicated, it takes up to 6 faces to be projected and the cut and extracted images to show all the objects. In which, the projection always has the main view to be able to see the whole object.
Draw projection from bright object 2D model
In addition to applying the above standard, you also have to know how to imagine the object to be able to draw accurately and quickly.
– From the object, you will draw the following 2D projections:
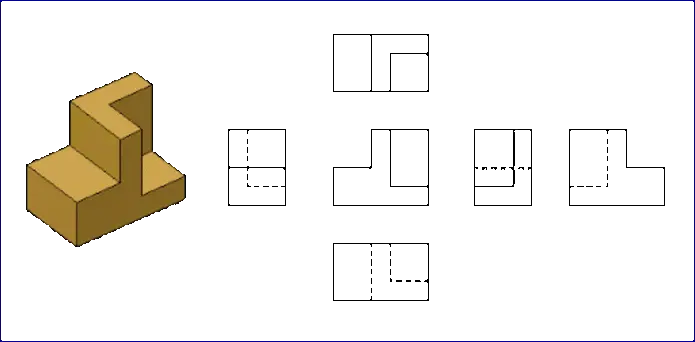
– You will draw and arrange the corresponding projections as above.
When drawing, you must draw the faces that show the most clearly and easily visualize the object. At the same time, limit the dashed directions and the number of projections just enough to visualize the object.
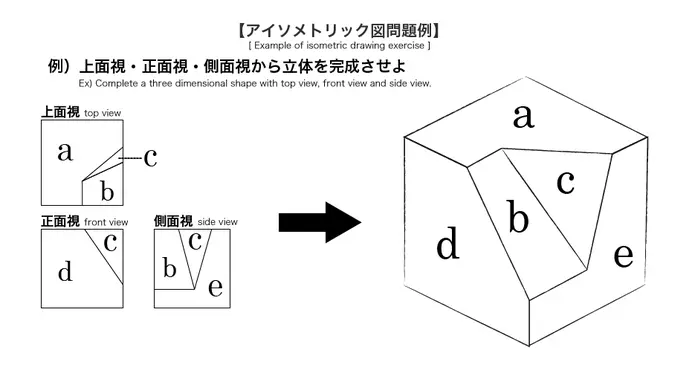
From the projection of 2D models to build real objects
In order to build a real body from a 2D view, technicians need to master the rules of viewing the image above.
From 2D drawings to build objects, you must visualize 3D objects. This is the ultimate goal of reading engineering drawings.
– From the 2D projection, build the object as follows:
ABOUT IDEA GROUP
IDEA specializes in providing machine design services, precision mechanical machining, JIG fixtures, and the manufacturing of automated machines for Japanese, American, and FDI enterprises in Vietnam. With 100% Vietnamese capital, IDEA operates in four main fields: machine design, precision mechanical machining, manufacturing of automation equipment and robot/AGV development, as well as technical services and trading.
The company has two branches in Vietnam, one in Japan, and one in the United States, adhering to the motto of “quick response, low cost, and high quality.” After more than 15 years of development and with a team of 250 professional staff, IDEA continuously improves quality and services to ensure customer satisfaction and has earned high recognition from global partners. IDEA aims to become Vietnam’s leading technology corporation, with the mission of contributing to the development of the industry and enhancing the value of Vietnamese enterprises.
View the details of our design services here: https://idea-america.com/IDEA-Products_and_Services.mp4
