Understanding and Reading Japanese Mechanical Drawings According to JIS Standard (Japanese Industrial Standards) has always been a challenge for many. To help you familiarize yourself with and master the process of reading Japanese mechanical drawings (JIS) easily and accurately, this article will provide the most detailed and straightforward guide.
What is JIS Standard?
JIS Standard (Japanese Industrial Standards) is Japan’s industrial standard system, widely used in the mechanical industry and other industrial activities in Japan
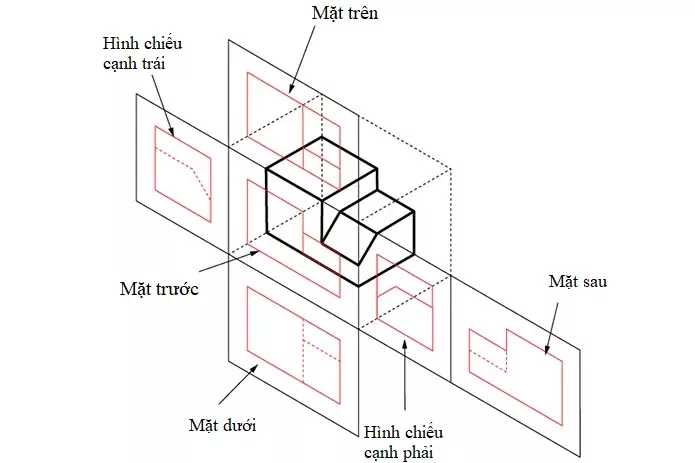
A significant difference between Japanese and Vietnamese mechanical drawings is the projection layout. According to JIS standards, drawings use third-angle projection, meaning that the side and front projections are depicted in a specific manner (see illustration).
How to Read Japanese Mechanical Drawings
Moreover, for complex machining details, section views (to display the inside) and detail views are often used.
Guide to Reading Japanese Mechanical Drawings
1. Understand Projection Layout
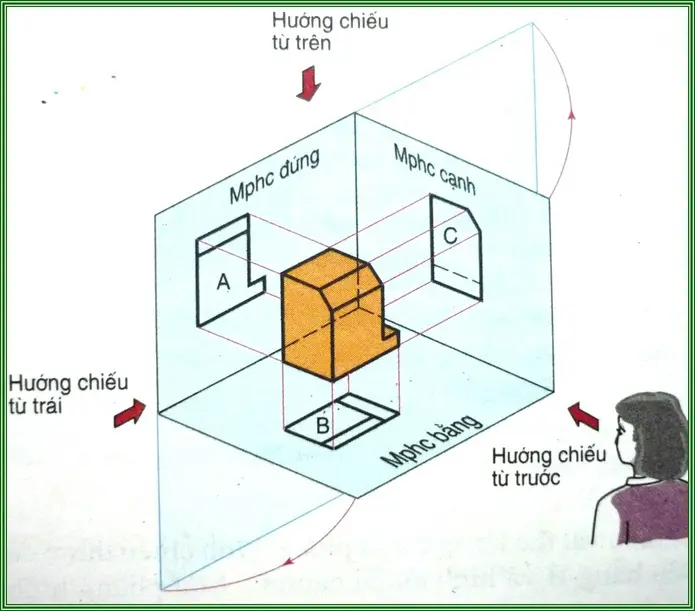
To read drawings according to JIS standards, you need to understand how the projections are created.
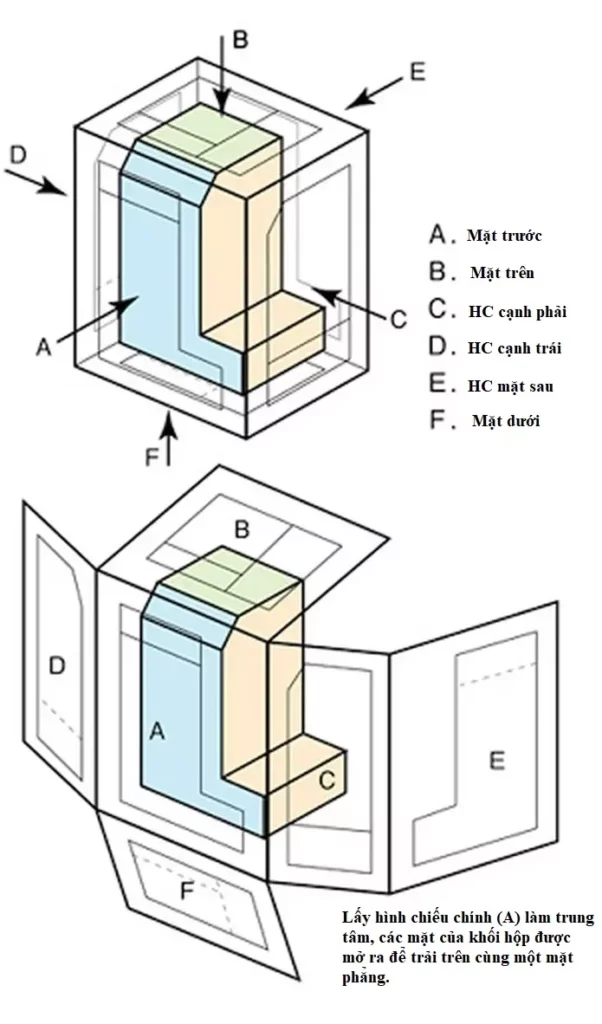
- Each object is placed within an imaginary box.
- From the outside, the faces of the box will show the projections of the object.
- When you “unfold” this box, you will see the corresponding projections on the planes.
For example:
- Front View: Direct view of the object (from the front).
- Side View: View from the side.
- Top View: Shows the width and depth of the object.
2. Number of Required Projections
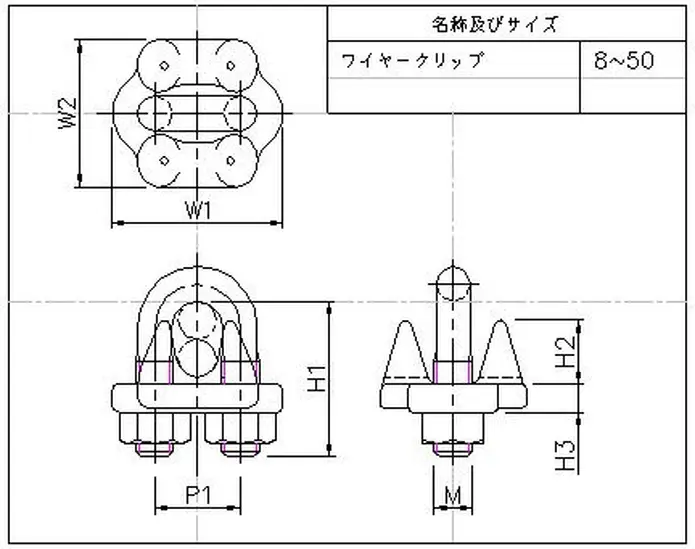
- Usually, 3 main projections are sufficient to clearly represent the object (front, top, side).
- For simple details, only 2 projections are needed.
- For complex parts, up to 6 views, along with section views and detail views, may be required to fully describe the part.
3. Section Views and Detail Views
- Section View: Used when it is necessary to show the internal parts of the object that cannot be depicted by regular projections
- Detail View: Enlarges small details to clarify machining requirements
Drawing Projections from 3D Models to 2D
To draw a JIS-standard compliant mechanical drawing, follow these steps:
- Visualize the 3D space: Imagine the actual object in your mind before drawing.
- Draw the necessary projections: Choose angles that clearly represent the object’s shape.
- Avoid excessive use of hidden lines (dashed lines).
- Prioritize easy-to-understand projections and minimize the number of views.

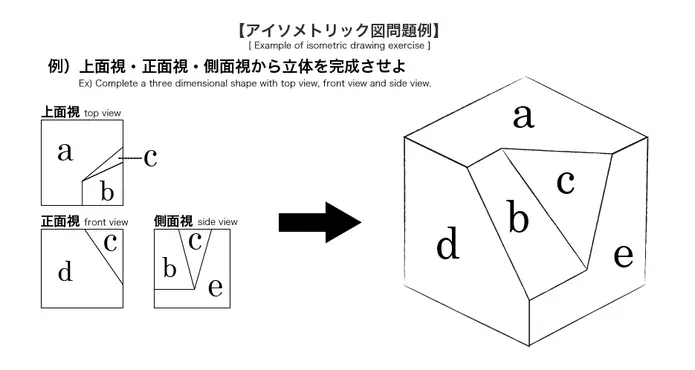
The ultimate goal of reading technical drawings is to visualize and construct a 3D object from 2D projections.
To achieve this, you need to:
- Understand the projection rules: The front, side, and top views provide full information to recreate the 3D object.
- Sketch the object: Based on the projections, sketch a preliminary version of the object before finalizing the details.
- Use the other views: Complete the object by checking other projections to ensure accuracy.
Tips for Learning to Read Japanese Mechanical Drawings
- Practice regularly: Start with simple drawings and gradually move to more complex ones.
- Enhance spatial imagination: This is crucial when working with technical details.
- Understand JIS standards: Learn the symbols and conventions of the JIS standard to easily read and understand the drawings.
Conclusion
Reading Japanese mechanical drawings according to JIS standards requires patience and practice, but once mastered, you will be able to accurately interpret technical requirements. We hope this article has helped you better understand how to read and apply Japanese mechanical drawings.

